Blog

  • 7 Excellent Ways to Customize Your Camper’s Interior

    7 Excellent Ways to Customize Your Camper’s Interior


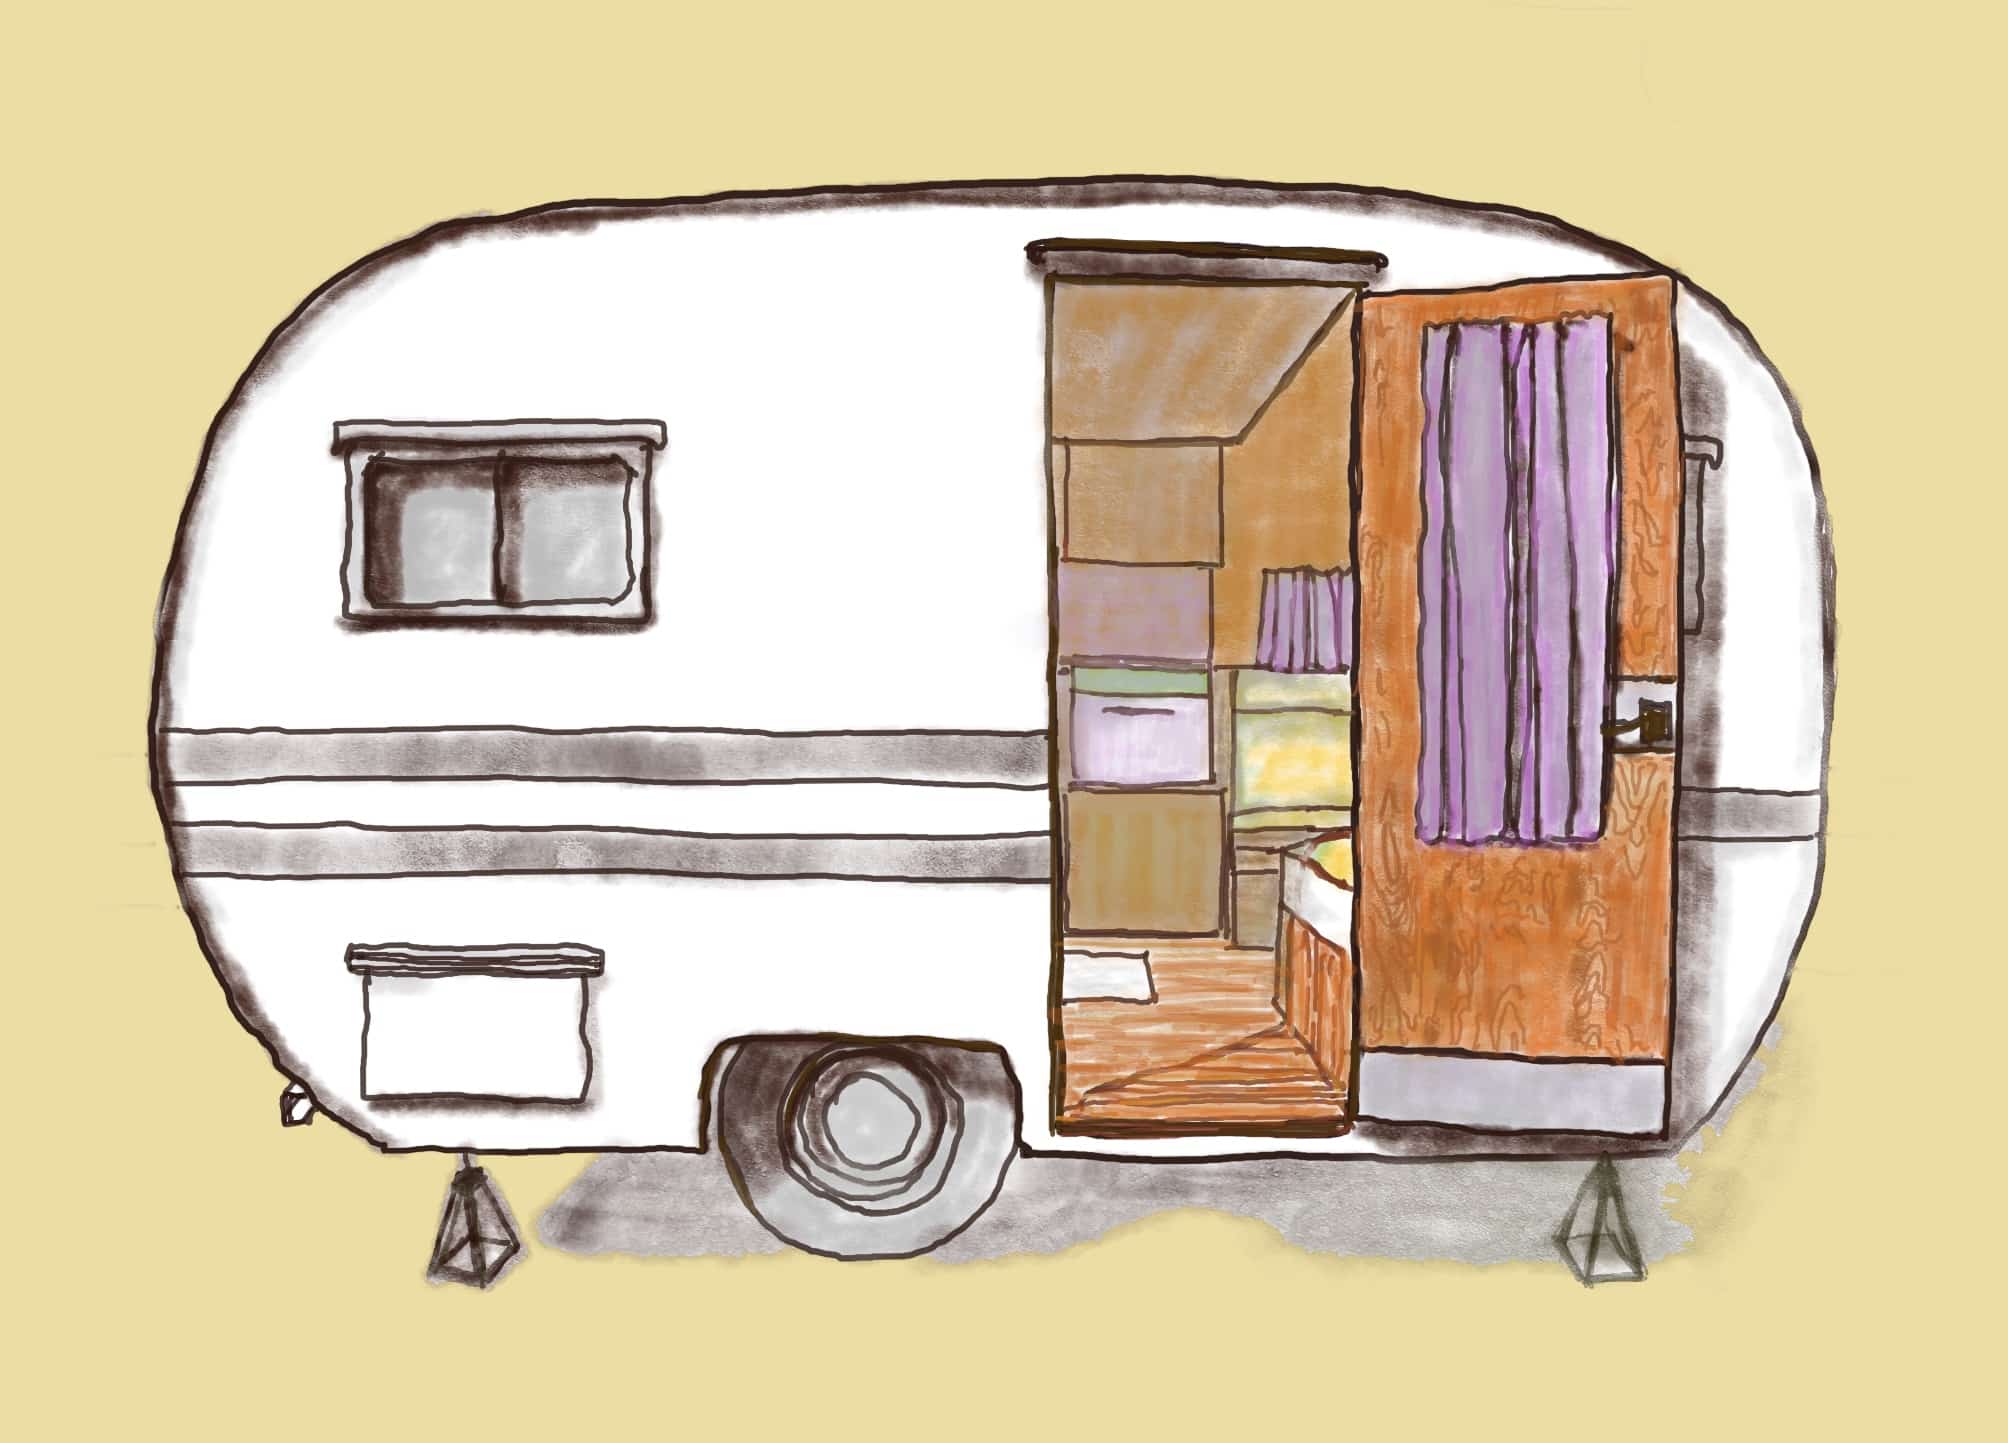
    One big advantage of owning your camper is being able to style it your way. Creating the specific look and feel for your home-on-wheels is a breeze with these inexpensive fixes.

    Even the least crafty among us will find some painless options in this article for making their rig feel more like the home they imagined. And the best part? Most of these options were designed with renters in mind, so they’re not only easy to install: they’re easy to remove.

    Peel and Stick Backsplash Tiles

    peel and stick mosaic
    Image from Camping World

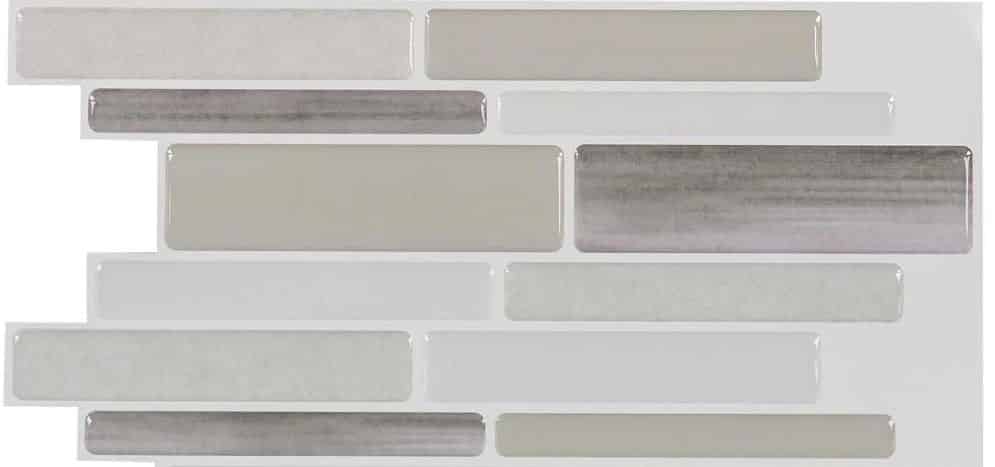
    Peel-and-stick tiles are really easy to install and add visual interest to your kitchen or bathroom space. If your space is bland and uninspired, or if it just needs a little extra something, these tiles may be your answer. Many people find RV interiors to be lacking but they don’t want to do a full remodel and tear apart their RV. With a peel-and-stick solution like this, they have the ability to dramatically alter the look of their RV without doing a full remodel. 

    Appliance Covers

    stovetop cover
    Image from Camping World

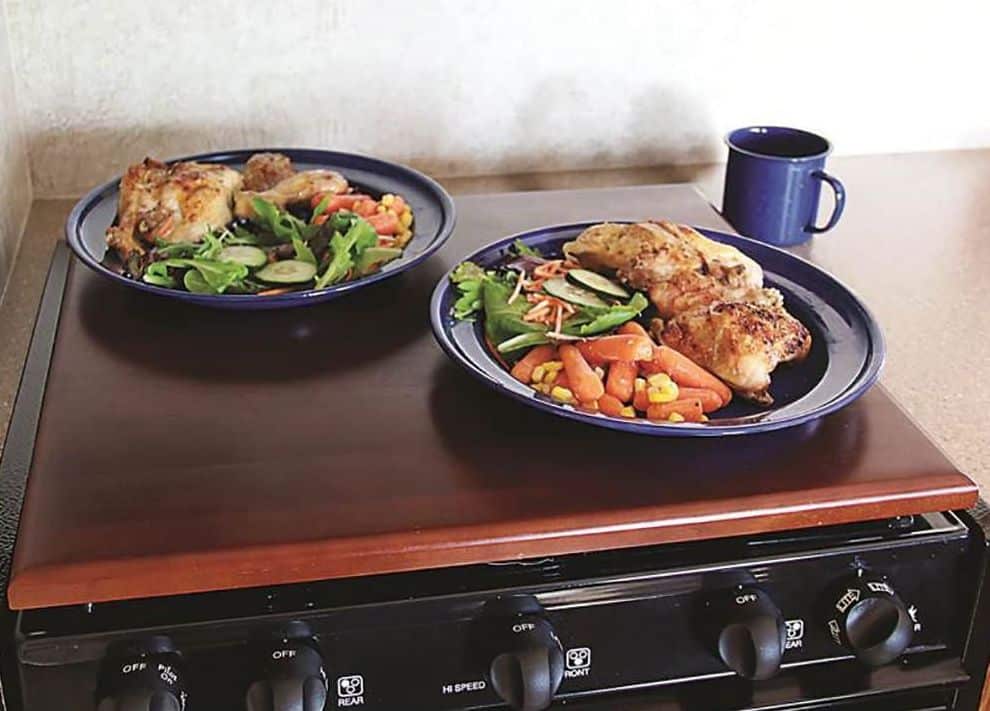
    Old, ugly appliances in your camper can be covered up inexpensively and fast with covers. Offered in stainless steel, black, white and other options to match the rest of your appliances and decor. Additional countertop space can be added with this hardwood stovetop cover, which can also be altered using peel-and-stick covers to change the look to better accent your space. This also gives you more prep space in what’s likely a tight kitchen area. 

    Removable Wall-Paper and Wall Art

    Photo by Devin Kleu

    If you’re looking for a more dramatic change, there are tons of removable wallpapers. Any pattern your heart desires, it’s probably out there: and if it isn’t, you can design and print your own! Most websites offer a sample size, which is helpful when matching your wallpaper to other decor. There are some particularly beautiful botanical designs to be found, alongside polka dots, ginghams, terrazzo, minimal dashes and lines, and more. Chalkboard Wallpaper is a fun addition for campers with children.

    Removable wallpapers are designed to remove cleanly from surfaces, with no additional clean-up. They’re essentially a giant sticker that can be repositioned, which is fortunate, as they can be tricky to apply evenly. Try using a squeegee as you apply, and pre-cut your wallpaper with a straightedge and a utility knife. 

    Additionally, wall art is a very smart addition to your camper and can be added to help transform your space. A fun sign or an interesting wall sculpture or art piece picked up at one of the places you have visited can really help your camper feel more like home. Use Command Hooks to avoid drilling into the walls of your RV!

    Laminate and Vinyl Flooring

    Changing your flooring is no longer a job best left to the pros. Some laminate and vinyl flooring can be cut with a utility knife or with a vinyl tile cutter (which looks exactly like an art teacher’s paper cutter), making it easy to produce specific sizes. The best part about today’s laminate and vinyl is that they can be installed in an afternoon or two by someone with little experience. 

    While the ugly vinyl flooring you’ve seen in your great-aunt’s basement does still exist, laminate and vinyl flooring are now offered in many chic, upscale options. A wide variety of colors, patterns, textures, and faux-options are at your fingertips. Many finishes are available, however, you’ll want to look for a low-gloss or matte finish to hide scuffs, scratches, and every other abuse that flooring is on the receiving end of. For interesting visual texture in your camper, consider cork laminate, hand-scraped or grain-embossed wood laminate, luxury parquet vinyl.

    Groutable peel-and-stick vinyl flooring can look upscale and chic when installing in a herringbone pattern. Hex vinyl flooring is an improvement to most RV floors. Monochromatic patterns can add a down-stated flair to an otherwise bland space. For a more unique space, many unusual options can be found online. In addition to patchwork, geometric, and watercolor-style vinyl, more traditional options are available online and in stores. Moroccan, Cuban, French, and Spanish-style vinyl can be found with a simple Google search.

    Peel and Stick Countertops

    Photo by Balkan Campers

    Most RV countertops are plain, which is fine for many folks. If you desire a more true-to-you and homey space; something to provide a beautiful backdrop for meals and every other table-activity, you may find a fun project in peel and stick countertops.

    Similar to laminate and vinyl flooring, peel and stick countertops are offered in a variety of effects and are fairly inexpensive. Faux marble, granite, stainless steel, wood, butcher block, concrete, and many other options are available to complete your desired style. These can be tricky to install, so a non-repeating pattern may be a newbie’s best option.

    You’ll want to have a squeegee, an Exacto knife, a cutting board, and measuring tape handy during install. Take your time to makes sure it fits perfectly and you’ll never even be able to tell that its not the real thing.

    Lighting

    The ultimate environment changer, this multi-color LED light strip allows you to create mood lighting at the touch of a button. Great for people with sensitive eyes, or simply, a great way to set the tone for your evenings inside of your camper. Additionally, the directional head of this brushed nickel LED reading light allows users to place the light directly where it is needed and the on/off toggle switch is simple to use.

    Low-hanging lighting doesn’t really work in most campers. Less than 3″ in-depth, this minimal dinette light is ideal for space-saving overhead ambient lighting. The brushed nickel finish and, white alabaster glass dome complement a variety of aesthetics. 

    This sleek, mission-style dinette light would enhance any dining space, especially if hung over the table. 

    The Details

    Throw blanket
    Image from Camping World

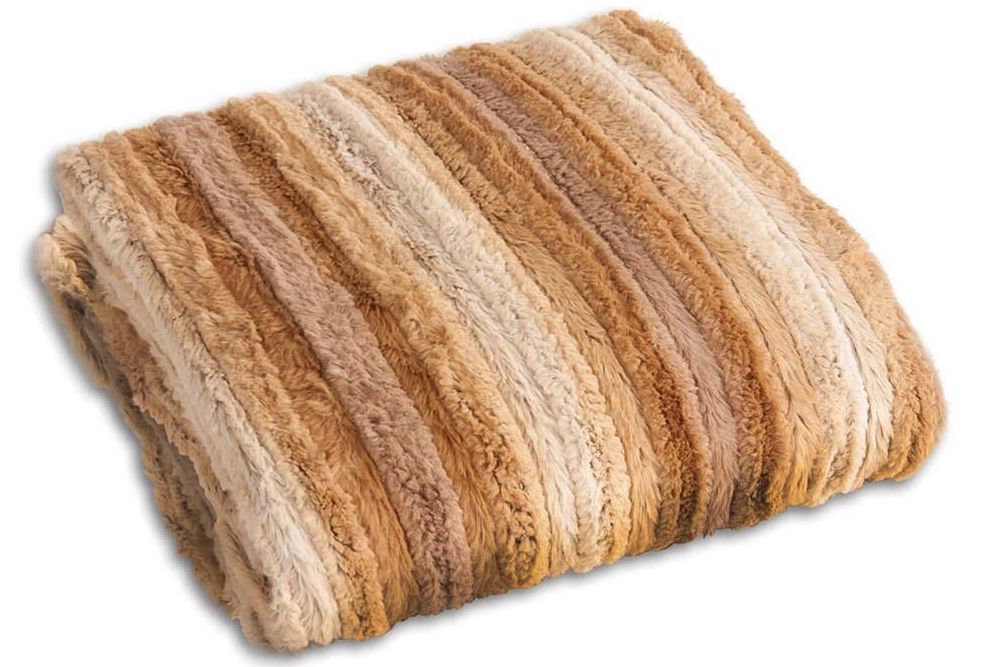
    Neutrals are an easy way to set a calm tone in your home away from home. Throws such as the one shown above complement a variety of styles and colors, and look great tossed over a classy, comfy chair or couch. 

    Custom day/night shades or impulse roller shades will make your space appear larger and more orderly by minimizing wall clutter. Another minimal design, the clean lines of this casual chair will sharpen up your space if you have room for it. 

    For a more whimsical and kid-friendly space, consider adding this color-changing indoor/outdoor block to your decor. A travel keepsake map allows you to display pins and other small memorabilia to the states you’ve visited. This funky retro analog clock would make a fun addition to your bedroom space.

    Basically, think of the space you have an how you can make it more of your own. You want your RV to reflect you and not be bare basic or only what the manufacturer built it to be. Craft your own space and you’ll live happier on the road. 


    How have you made your RV your own space? Leave a comment below!


    Source link

  • SftR 071: What Type of RV Should You Buy?

    SftR 071: What Type of RV Should You Buy?


    Sam brings Ian Baker back on the podcast to chat about various types of RVs and answer the most important question… “What type of RV should you buy?”. Tune in to hear the difference between the classes of motorhomes and the pros and cons of towables vs. non-towables. Plus, learn what to look for in used or new RVs!

    Want to learn more? Check out the videos on our YouTube channel! You’ll find RV walkthroughs, brand reviews, RV lifestyle tips, and more!

    Some highlights from this episode:

    • 3:30 – Motorhomes – Class A, B, and C
    • 7:30 – Towables – Travel trailers and fifth wheels
    • 14:40 – Questions to ask yourself
    • 18:30 – Red flags to look for when shopping for a used RV
    • 25:00 – Pro tips for buying a new RV

    ** Subscribe to Stories from the Road on iTunesSpotify, or Google Play **


    Source link

  • Cook This Mustard Grilled Pork Tenderloin the Next Time You’re Camping

    Cook This Mustard Grilled Pork Tenderloin the Next Time You’re Camping


    If you’re looking for an easy recipe to grill, this mustard and seasoning salt pork tenderloin is always a crowd-pleaser. And, the best part is it’s simple to make with only three ingredients.

    Pork tenderloin is different than a pork loin – the tenderloin is a long, thin cut of meat from a different part of the animal. Make sure you’ve grabbed a tenderloin for this recipe, as loins take much longer to cook and are better for roasting. For this quick grilling recipe, the tenderloin cut is perfect.

    This recipe calls for an easy rub of mustard and seasoning salt. You can use yellow or brown mustard, both give the meat a great taste with the brown mustard being a bit subtler. So use whatever you have on hand.

    Grilled pork tenderloin
    Image by the author

    This recipe calls for an easy rub of mustard and seasoning salt. You can use yellow or brown mustard, both give the meat a great taste with the brown mustard being a bit subtler. So use whatever you have on hand.

    Ingredients:

    2 Pork tenderloins
    Yellow or brown mustard
    Seasoning salt such as Lawry’s or Johnny Salt

    Equipment:

    Grill
    Knife
    Tongs

    Instructions:

    Rinse tenderloins and pat dry. Trim and remove any excess fat or silver skin. Smear with a good coating of mustard and sprinkle with the seasoning salt on all sides.

    Grilled pork tenderloin
    Image by the author

    Heat the grill to medium-high with direct and indirect grilling surfaces. On a charcoal grill, this means setting up the briquettes on one half of the grill. For gas, simply turn on the burners on half the grill, and leave the other half off.

    Place tenderloins on the grill over direct heat and close the lid. Grill pork on direct heat for five minutes. Flip the tenderloins and grill the other side over direct heat with the lid closed for another five minutes.

    Grilled pork tenderloin
    Image by the author

    Move the pork to indirect heat and grill for another 10-15 minutes, again with the lid closed, until the internal temperature reaches 140 degrees F.

    Grilled pork tenderloin
    Image by the author

    Remove from the grill and allow to rest for five minutes. The pork will continue to cook and the internal temperature should rise to 145-150 degrees F for medium doneness. We recommend using a meat thermometer in the thickest part of the meat to confirm that the correct internal temperature has been reached. You’ll see the temperature rise in the five minutes or so after removing the meat from the grill.

    Then slice and serve! It’s great on its own, or with your favorite BBQ or dipping sauce.

    Note: the FDA recommends cooking pork to an internal temperature of at least 145 degrees F for safety.


    Do you have any questions or concerns? Leave a comment below!


    Source link

  • RVing the Rails – Excursion Trains in Ohio

    RVing the Rails – Excursion Trains in Ohio


    Many times camping trips involve exploring new territory and discovering enticing attractions along the way.  Passenger tour trains have that magnetic appeal for many RVers, providing a novel way to see hidden countryside not normally viewed from the road. Railroad passengers learn about local history, culture and the many colorful characters from the communities visited. Camping World wants to make sure you don’t miss the departing whistle, so we have created a series entitled RVing the Rails. You will find the most popular excursion trains to ride in each state, complete with any specialty trains they might offer.

    Photo Tripping America - Excursion Trains in Ohio - Camping World

    Today we will start with the most popular trains in Ohio:

    Cuyahoga Valley Scenic Railroad

    Photo Tripping America - Excursion Trains in Ohio - Camping World
    Photo Credit: NPS

    Built in 1880 to transport coal and passengers, this railway became part of the B&O Railroad and the Chessie Line, before interest in creating a scenic excursion on the existing rails became a reality in 1972.

    Running from Independence to Akron along the Ohio and Erie Canal Towpath, the railroad now takes riders through Cuyahoga Valley National Park, where visitors can experience reclaimed wetland habitats, forests and rolling hills. Passengers can board or disembark at three stations to explore the park, or ride a specialty train throughout the season.

    Railway and Locomotive Types

    The Cuyahoga runs on standard gauge rails with diesel engines. Its passenger cars vary from comfortable enclosed coach cars to elegant lounge, café, dome, and dining cars, outfitted to enhance the golden age of transportation.

    Seating Options

    The railroad offers several classes of service to its passengers:

    • Coach All Day Pass – Get on and off the train throughout the day, exploring the national park at your leisure. These tickets have general unassigned seating.
    • Table Top – Assigned seating with tables in a dining car.
    • First Class – Assigned seating with padded chairs and tables in first class enclosed car.
    • Executive Class – Assigned seating in a lounge car, with complimentary muffin and beverage.
    • Upper Dome – Assigned seating in a dome observation car, with padded seats and tables.

    Check the train schedule to select dates, times and classes of service available to fit your travel schedule.

    Riding Options

    Photo Tripping America - Excursion Trains in Ohio - Camping World
    Photo Credit: Cards84664 (CC BY-SA 4.0)

    The Cuyahoga Valley Scenic Railroad has a wide variety of rail cars in which to enjoy your excursion:

    • Enclosed Coach Car – Seating is unassigned in a passenger car with sections of four seats – two facing each other.
    • Vintage Dining Car – Four-top seating is assigned in a restored enclosed car.
    • Dome Observation Car – Assigned seats in a panoramic glass-enclosed observation car, with seats configured in groups of four with a table between.

    Specialty Trains

    • Polar Express – Wear your pajamas and join the fun on the Polar Express train, running from November 8 through December 21. Cookies and cocoa warm up the occasion as the train makes its way into North Pole Village, where caroling elves greet children and the young at heart.  Santa even makes an appearance.
    • Murder Mystery Train – Special Friday night trains cater to the detective in you, with a murder mystery that must be solved before the ride is over. Wear period costumes, indulge in appetizers and dig up clues to find a culprit as the railroad leads passengers down the tracks on this two-hour excursion.
    • Ales on Rails – Enjoy five beer samples paired with appetizers as you learn about the brews’ body, aroma, and finish. Available to those 21 and over, passengers will take home great memories and a commemorative tasting glass.
    • Dinner Train – Fall and Summer dinner trains on Friday evenings include a two-hour train ride with an elegant four-course meal and complimentary bar service.

    Length of Season

    Photo Tripping America - Excursion Trains in Ohio - Camping World

    The Cuyahoga Valley Scenic Railroad runs year-round, but specialty rides have specific dates of service.  Explore the Cuyahoga Valley National Park by train, or bring your bicycle and utilize their “Bike Aboard” option, with several stops to carry you and your two-wheeler down the line.

    Hocking Valley Scenic Railroad

    Photo Tripping America - Excursion Trains in Ohio - Camping World
    Photo Credit: JP Mueller (CC BY-SA 2.0)

    Begun as the Mineral Railroad in 1864, these tracks were initially laid the bring salt and coal from Athens to Columbus, Ohio, with a cannon on board to announce the train’s arrival into each city.

    By 1899, the line had attained the name of Hocking Valley Railway, transporting cargo and commuters, but the Great Depression brought an end to passenger travel along those rails. It wasn’t until the mid-1980s that volunteers began to resurrect the railroad, creating today’s weekend trains that run between Nelsonville and Haydenville, from Memorial Day through the end of October. There are also several special event trains that run on specific dates.

    Railway and Locomotive Types

    These standard gauge tracks support diesel engines with a variety of cars, dependent upon the season and the event.  A couple of days each year the Hocking Valley Scenic Railroad hosts a Steam Day, where passengers ride behind a restored 1920 coal-fired steam locomotive. This treat sells out quickly, so check the schedule and grab your tickets early!

    Seating Options

    Photo Tripping America - Excursion Trains in Ohio - Camping World
    Photo Credit: Jaknouse (CC BY-SA 3.0)

    All seating is unassigned, with space available in heated, enclosed coaches, and in summer several cars have air conditioning, while others have windows that can be opened.

    Riding Options

    Most cars are enclosed with general seating, but some specialty trains include double-decker cars or cabooses.  Select the car you are most comfortable in and enjoy the ride through Hocking River country to see the river locks.

    Specialty Trains

    Photo Tripping America - Excursion Trains in Ohio - Camping World
    Photo Credit: Don O’Brien (CC BY-SA 2.0)
    • Easter Bunny Train & Egg Hunt – Enjoy a two-hour round-trip outing to the Easter Bunny’s secret hidden egg location, where children hunt for eggs that contain prizes. Only two Bunny Trains are on the schedule, so hop on over to the website to get your tickets!
    • Ohio’s Friendliest Train Robbery – Get robbed by train bandits along the tracks on this special train.  These robbers are looking for loot when they stop the train, so be prepared with some “fake” bills!
    • All Caboose Train – On August 31 a collection of privately-owned cabooses is assembled on the train, with each passenger given the opportunity to disembark and photograph the “caboose train” as it rolls down the rails.
    • Trunk or Treat Train – Dress your kids in their scariest costumes to collect treats as the train winds its way through spooky Hocking Valley.
    • New Year’s Eve Train & Fireworks – Take a ride through the evening countryside, stopping at the stroke of midnight to enjoy fireworks from the train.

    Length of Season

    The Hocking Valley Scenic Railroad is run by an all-volunteer group, with trains scheduled on Saturdays and Sundays from Memorial Day weekend through the end of October. Specialty trains have specific dates running from April to the end of the year.

    Cincinnati Dinner Train

    Photo Tripping America - Excursion Trains in Ohio - Camping World
    Photo Credit: CincinnatiDinnerTrain.com

    This unique railway has been in existence for 10 years, capturing passengers’ attention with a twist on Date Night. Ride in one of four authentic 1949 dining cars along the Ohio River while indulging in a scrumptious four-course meal, complete with live musical entertainment.

    Riders are encouraged to dress in period clothing, as an event photographer snaps candid images of everyone onboard. The entire trip is 25 miles, completed in three hours with passengers limited to those over 12 years old.  It’s the perfect recipe for some time with loved ones in a unique atmosphere.

    Railway and Locomotive Types

    The Cincinnati Dinner Train runs on standard gauge rails with a diesel engine powering the train. The dining cars are all circa the 1940s, with a kitchen car used to provide hot-from-the-oven meals onboard.

    Seating Options

    Photo Tripping America - Excursion Trains in Ohio - Camping World
    Photo Credit: CincinnatiDinnerTrain.com

    Staff assigns seating after the reservations have been made on the dinner train. All cars are climate-controlled dining cars with tables for four, although there are a few two-person tables. Tickets are all the same price and children under 12 are only allowed on chartered cars.

    Riding Options

    The dinner train consists of a four-course dinner, served in authentic 1940s dining cars during a three hour narrated train ride.  All cars offer the same amenities, so there are no varying classes of service available. Check out their schedule for dates of service.

    Besides the Saturday evening dinner trains, passengers have the following optional opportunities:

    • Locomotive Cab Ride – A seat is available every Saturday evening in the diesel locomotive. One lucky rail fan can eat dinner with his or her friends and family on the way out of the depot, then ride with the train’s engineer in the cab all the way back.  The ticket includes a Cincinnati Dinner Train cap to commemorate the occasion.
    • Private Cars – Procure one, two, three or all four dining cars for your own private event. Each car can handle from 12 to 60 passengers, and ticket prices include dinners, taxes and gratuities.  And if you anticipate a very large event, rent the entire train!

    Specialty Trains

    Photo Tripping America - Excursion Trains in Ohio - Camping World
    Photo Credit: CincinnatiDinnerTrain.com
    • 1949 Train – The September 7th dinner train hearkens back to the late 1940s. Dinner is served in the authentic 1949 dining cars, with retro entertainment by the Queen City Sisters singing hit songs from that time frame. Guests are encouraged to don costumes reminiscent of the Big Band era, with a photographer on hand to capture the essence of historical fashion.
    • Labor Day Fireworks Train – Enjoy dinner on the September 1st evening train as it heads downtown, where Cincinnati celebrates the end of Summer with a blast!

    Length of Season


    The Cincinnati Dinner Train runs every Saturday (except Thanksgiving weekend) from March through December. The dress is business casual and no jeans, shorts or flip-flops are allowed.


    Join the thousands of RVers that have a love affair with trains and ride the rails on your next camping trip. Check out the other excursion trains available on a state-by-state basis in our series, RVing the Rails on Fridays.


    Source link

  • Camping World’s Guide to U.S. Virgin Islands National Park

    Camping World’s Guide to U.S. Virgin Islands National Park


    An escape to “The Islands” is on the wishlist of many a traveler, and the Virgin Islands are usually at the top of that list. So, it shouldn’t surprise us that the National Park Service has one of the most coveted vacation spots on its roster: The U.S. Virgin Islands National Park covers about 60% of St. John’s Island, one of the US Virgin Islands.

    Imagine relaxing on immaculate white sand beaches, snorkeling through protected coral reefs and meandering through hundreds of years of history all in one place. Here visitors can explore the same coves where pirates hid their bounty and Christopher Columbus greeted Native Americans in 1493.

    Relish the sounds of the Caribbean surf lapping the sand or hike through tropical forests to discover the magnetic pull of island life.

    History of Virgin Islands National Park

    Photo Tripping America - Virgin Islands - Camping World

    The first residents of the Virgin Islands were hunter-gathers from South America. They date back to 840 BC, but within 1,600 years villages had been established in almost all the beaches on St. John. By the time Christopher Columbus arrived here in 1493 Taino Indians had settled on the island, and with Columbus came Europeans, who began battling over ownership of the islands.

    Merely 100 years later, pirates discovered the seclusion and safety of this region, using it to hide out as they plundered treasure from Spanish ships. Blackbeard himself sailed this waters, using the hidden ports to lie in wait for unsuspecting ships carrying expensive cargo.

    Members of the Danish West India and Guinea Company were the first to settle on the Island of St. John in the 1700s, establishing sugar cane plantations, which required large numbers of laborers. The planters initially used the indigenous tribes as slave labor, then began importing Africans from the Portuguese-dominated slave trade.

    It didn’t take long for the number of slaves to become five times greater than the number of Danish settlers and a serious uprising occurred, putting the control of the island in slave hands for nearly six months. However, rather than return to captivity and slavery, more than two dozen Africans took their own lives before French forces could get to them.

    Photo Tripping America - Virgin Islands - Camping World

    Finally ending the practice of slavery in 1848, the sugar cane plantations soon reaped what they had sewn.  They began to fail, as they had been dependent upon the free labor.

    In need of a naval base during the first World War, the United States purchased the Virgin Islands from Denmark in 1917. Wealthy investors began buying land and rehabilitating many of the plantation houses, creating resorts. Laurence Rockefeller owned a large swath of St. John and in 1956 deeded the property over to the National Park Service, with the agreement it would be protected from further development.

    Today Virgin Islands National Park encompasses more than 14,000 acres full of forests, pristine beaches and aqua blue waters full of coral reefs and colorful sea life.

    Why Can’t You Visit Virgin Islands National Park in Your RV?

    Photo Tripping America - Virgin Islands - Camping World
    Photo Credit: Carolyn Rogers NPS

    The park is on an island that requires first a plane ride and then a boat ride to get there. So, RV to Miami, find a place to park it for a while and enjoy a quick holiday in a resort or at the campground on the island (with tents and linens included).

    Your motorhome will be waiting for you when you get back from a relaxing getaway at Virgin Islands National Park.

    Places to Go

    Here is a list of the places you need to check out when you visit the island.

    Cinnamon Bay

    This is the longest beach on the island, perfect for sailing and windsurfing, and snorkeling gear is available for rent here, as well.

    Trunk Bay

    This beach even comes with its own lifeguards, so enjoy swimming and snorkeling in the sun and surf.

    Visitor Center

    Located in Cruz Bay, the visitor center provides brochures, maps, and information about the park, as well as schedules for ranger-led tours and hikes.

    Things to Do

    Photo Tripping America - Virgin Islands - Camping World

    Here are some of the activities you can and should do while enjoying your stay at the park.

    Hiking

    There are several hikes on both the North and South Shores of the island, varying in length from 15 minutes to two hours. Here are a few of the 20 trails through the park:

    Snorkeling and SCUBA Diving

    Photo Tripping America - Virgin Islands - Camping World

    There are several locations that have exquisite snorkeling and SCUBA diving opportunities, including the beaches within the park.

    Sailing, Windsurfing, and Kayaking

    Cinnamon Bay has perfect conditions and just the right amount of wind for these water sports, and they offer rentals.

    Fishing

    It is limited by location and types of fish. Here is the Virgin Islands Fishing Handbook

    Camping

    Cinnamon Bay Resort has a campground that includes bare sites for those with their own tents, and platform tents, which come with tent, camp mattresses and linens.  There are also several cottages that can be rented.

    Birdwatching

    The forests on St. Johns Island have a wide diversity of birds, including hummingbirds, cuckoos and warblers.

    Beach Combing

    The simple pleasure of a walk along the beach collecting shells or building a sandcastle is easy to do here, with so many quiet beaches to choose from.

    When to Visit Virgin Islands National Park

    Photo Tripping America - Virgin Islands - Camping World

    When is there a bad time to visit a Caribbean island? Many travelers love to visit in the winter, substituting sunny warm beaches for the cold and snow of the northern states, so December through March is usually the busy season for Virgin Islands National Park.

    The park is open year-round, and as long as there is water for cooling off, even summers are a delightful time to enjoy sunsets on the beach and snorkeling among the coral reefs.

    One caveat—watch the weather reports if planning a trip to the island between August and October, as that is prime hurricane season.

    Where You Can Stay

    Photo Tripping America - Virgin Islands - Camping World

    Obviously, there are no RV campgrounds or dispersed sites on St. John’s Island. Since arrival to the island requires an airplane flight, travelers are reminded to leave their motorhome or travel trailer on the mainland.

    However, camping by tent is allowed on the island at the Cinnamon Bay Resort, and cottage rentals are available there, as well. If looking for an RV campground on the mainland to utilize before and after your trip to St. John, here are a few suggestions in the Miami area:

    Getting to and Around Virgin Islands National Park

    Photo Tripping America - Virgin Islands - Camping World
    Photo Credit: Mattes

    Getting to Virgin Islands National Park is a three-part process. Visitors must fly into St. Thomas, as the Island of St. John has no airports. Once landed, rent a car or take a taxi to the east end of St. Thomas Island and the town of Redhook. Take a car barge or people ferry to St. John’s Island. From the ferry terminal, it is a short walk to the National Park visitor center.

    There are two roads on St. John and both are best traversed by car, as they are steep and winding. Vehicles are required to stay within parking areas and will be ticketed if parked outside of designated regions or on fragile vegetation.

    Island Lure

    Photo Tripping America - Virgin Islands - Camping World

    A visit to Virgin Islands National Park is more like a getaway, where travelers immerse themselves in the sights and sounds of the Caribbean while absorbing the tumultuous history and wonderful mixture of cultures and inhabitants that exist there today.

    It is a place for exploration, relaxation, and anticipation of what tomorrow will bring to this island oasis. Visitors are guaranteed to leave with an overwhelming desire to return time and time again.


    Do you want to visit the U.S. Virgin Islands National Park? Why or why not? Leave a comment below!


    Source link

  • The New Essentials for RV Kitchens – Tips and Tricks, Proper Tools and Utensils

    The New Essentials for RV Kitchens – Tips and Tricks, Proper Tools and Utensils


    Your RV kitchen is smallMaybe not abysmally small, but probably smaller than your kitchen at home. You need kitchen tools that are efficient in size and utility, with multi-purpose functions.

    You need kitchen tools that can be easily stored in your small cabinets, and that won’t break if you hit a bump in the road. You need tools that will allow you to spend more time doing what you love while traveling, without sacrificing the qualities of a formerly-laborious, delicious meal.

    Illustration by Whitney Cleveland.

    Lacking space or time is no longer a problem for campers who love to cook—or for those who simply wish to eat well while on the road. A plenitude of kitchen tools and utensils exist that provide all-of-the-above qualities, and that won’t put a major dent in your travel expenses.

    Kitchen Appliances and Utensils

    Here’s a look at some kitchen appliances and utensils that can make a huge difference inside your RV. If you don’t have at least some of these, it’s time to upgrade.

    A Combo Mixer for Smoothies and Food Processing

    combo mixer
    Image from Camping World

    A fraction of the size of standard blenders, this combo mixer is perfect for your RV. Chop, grind, blend, mix, or whip up your next meal. The mixer can be used for whisking omelets, blending single-serving smoothies, grinding coffee beans, chopping salsa, preparing frozen cocktails and fresh sorbets, and so much more.

    Eating fresh has never been so easy, with the added benefit of avoiding all of the yucky preservatives and additives in canned/prepared food from the store.

    An Air Fryer for Healthier Dishes

    air fryer
    Image from Camping World

    Fried foods are freaking delicious. The caveat is that they’re incredibly messy to prepare, and unhealthy to eat regularly. Reduce clean-up, cook-time, calories, and saturated fats by treating yourself to an air fryer like the one shown above.

    From $40 to $200, an air fryer won’t break your budget. The equivalent size to a toaster oven, the fryer won’t take up too much space in your rig’s kitchen. If you love fried foods, this healthier alternative would be a great addition to your home away from home.

    Many recipes for the air fryer don’t use any oil at all, while oven-roasting uses about the same. Fry chicken, vegetables, and potatoes together for an easy, healthy meal. Canned chickpeas are excellent when air-fried with olive oil. Prepared frozen foods can be tossed in the fryer for a quick snack.

    An Instant Pot for Easy Cooking

    An Instant Pot will replace many kitchen tools and appliances in your kitchen. It can work as a slow cooker, pressure cooker, steamer, rice cooker, yogurt maker, and can even saute. Save space in your rig, and save time cooking, by using an Instant Pot.

    The high temperatures and sealed environment of an Instant Pot produces savory results by locking in moisture, reducing your need for cooking oils and other saturated fats. Expect cooking time to be cut in half (or more) for most dishes.

    Try Sous Vide

    The Sous Vide style of cooking involves a few simple steps: seal your food in a bag, then submerge it in a water bath to cook it to a precise temperature.

    Typically, you’ll finish prepping by grilling, searing, or broiling to add a crispy exterior layer. Sous Vide-prepared foods are exquisitely moist and flavorful. Pork belly, steaks, and lamb are especially delicious when cooked via Sous Vide, then seared for a short time as a final step.

    Look for Reusable and Foldable Utensils

    Anything you can reuse is a good idea at the campground. Definitely keep an eye out for tools and utensils you can use again and again. Here are a couple of ideas:

    Soda Caps Keep the Fizz In

    soda can cap
    Image from Camping World

    This cap will keep your canned beverage as bubbly as it was when you opened it: a great option for carbonated mixers and sodas. If you’re the kind of person who doesn’t want to finish a full can after opening it, then this is a great help.

    Reusable Coffee Brewing Dripper

    coffee filter
    Image from Camping World

    This collapsible and reusable coffee drip brewer is made of silicone and can help save space while still getting you your daily cup of coffee. You’ll won’t need filters for this either as it offers a screen system in the bottom. 

    This drip brewer will also work for teas and other hot beverages, making it a super handy item to have in your kitchen.

    Foldable Kettle for Simplicity and Space Savings

    foldable kettle
    Image from Camping World

    Made of lightweight (but strong) food-grade quality silicone, you can boil water in a few minutes in a foldable kettle. Most foldable kettles collapse into half for storage, and can be squished between other cooking tools in your cabinets when not in use.

    Find Ways to Make the Most of Your Space

    In addition to finding reusable items, you want to look for things that make it easy for your to make the most of your small kitchen space. Here are some fantastic options for your rig’s galley.

    Racks for Storage Areas

    storage rack
    image from Camping World

    A rack for your kitchen is the perfect multi-purpose tool. Use it to make extra space in your cooler or freezer, for dish-drying in the sink, or for additional cabinet storage.

    Slide Out Spice Rack For Easy Access

    This slide-out spice rack will keep your spice jars right where you left them, through even the bumpiest of terrains. The rack can hang from a shelf, slide out of a cabinet, or stand independently on a counter. It can be mounted with double-sided tape or can be screwed in.

    An Under-the-Cabinet Hammock for Fruit

    Fruit Hammock
    Image from Camping World

    This under-the-cabinet fruit hammock can attach anywhere you can screw-in two small hooks, keeping produce within your reach, but out of your way.

    Adjustable Cargo Net for Odds and Ends

    An adjustable cargo net is a useful device for just about anywhere in your RV, but it can be handy in certain storage areas of your kitchen. If you have some items you’re not sure what to do with, consider a cargo net for them.

    Non-Slip Cabinet Liners Holding Things in Place

    Simply line your cabinets with these non-slip liners and you’ll never have kitchen tools or appliances tumbling out of your cabinets again. These can be super helpful when transporting your RV from place to place if you keep the cabinets full. 

    In the end, its important to think about your kitchen space in your RV and how the items, appliances, and utensils fit into that space. There are plenty of new and improved options out there. The ones called out above should help you make the most of your kitchen space.


    How do you make the most of your RV’s kitchen area? Leave a comment below!


    Source link